As a responsible cat owner, it is important to know how to properly clean your cat’s ears to prevent infections and maintain their overall health. Cleaning your cat’s ears may seem like a daunting task, but with the right steps and supplies, it can be a simple and effective process.
To begin, gather the necessary supplies. You will need cotton balls, a cat-friendly ear cleaning solution, and treats to reward your cat during the process. These supplies will help make the experience more comfortable for both you and your furry friend.
Next, follow this step-by-step guide to safely and effectively clean your cat’s ears at home. Start by inspecting the ears for any signs of redness, discharge, or foul odor. If you notice any of these symptoms, it may be best to consult a veterinarian for further assistance.
Once you have inspected the ears, learn the proper technique to hold your cat securely while cleaning their ears. This will help avoid any discomfort or injuries during the process. Apply the ear cleaning solution as directed, being careful not to cause any harm to your cat’s delicate ears.
After applying the solution, gently wipe away dirt and debris from your cat’s ears using cotton balls or a soft cloth. Be sure to be gentle and avoid inserting anything deep into the ear canal, as this can cause damage.
To make the ear cleaning process more comfortable and stress-free for your cat, use positive reinforcement. Offer treats and praise to reward your cat during and after the ear cleaning session. This will help create a positive association with ear cleaning and make future cleanings easier.
Remember, if you notice any concerning symptoms or are unsure about the ear cleaning process, it is always best to consult a veterinarian for professional help. They can provide guidance and ensure your cat’s ears are properly cared for.
Gather the Necessary Supplies
Gathering the necessary supplies is the first step in cleaning your cat’s ears. It’s important to have everything you need before you begin to ensure a smooth and successful process. Here are the essential supplies you should have:
- Cotton balls: These are gentle and soft, making them perfect for cleaning your cat’s ears without causing any discomfort.
- Cat-friendly ear cleaning solution: Look for a specifically formulated solution that is safe for cats. Avoid using any products that contain alcohol or harsh chemicals.
- Treats: Rewarding your cat during the ear cleaning process can help make it a more positive experience. Have some of your cat’s favorite treats on hand to offer them as a reward for their cooperation.
By ensuring you have these supplies ready, you’ll be well-prepared to clean your cat’s ears effectively and keep them healthy.
Step-by-Step Guide to Cleaning
When it comes to cleaning your cat’s ears, it’s important to follow a step-by-step guide to ensure that you do it safely and effectively. By taking the necessary precautions and using the right techniques, you can help prevent infections and maintain your cat’s overall ear health. Here is a simple guide to cleaning your cat’s ears at home:
- Inspecting the Ears: Before you begin the cleaning process, carefully examine your cat’s ears for any signs of redness, discharge, or foul odor. If you notice any abnormalities, it’s best to consult a veterinarian for further evaluation.
- How to Hold Your Cat: To avoid causing any discomfort or injuries to your cat, it’s important to learn the proper technique for holding them securely during the ear cleaning process. Gently but firmly hold your cat’s head with one hand, ensuring that they feel supported and comfortable.
- Applying the Ear Cleaning Solution: Use a cat-friendly ear cleaning solution recommended by your veterinarian. Apply a few drops of the solution into your cat’s ear canal, being careful not to insert the applicator too deeply. Massage the base of the ear for a few seconds to help distribute the solution.
- Wiping and Cleaning the Ears: After applying the ear cleaning solution, gently wipe away any dirt and debris from the outer part of your cat’s ear using a cotton ball or a soft cloth. Avoid using cotton swabs or any sharp objects that could potentially harm your cat’s delicate ears.
Remember to be patient and gentle throughout the entire process. If your cat becomes stressed or agitated, take a break and try again later. It’s also important to reward your cat with treats and praise after each successful ear cleaning session to make the experience more positive. However, if you notice any concerning symptoms or are unsure about the cleaning process, don’t hesitate to seek professional help from a veterinarian.
Inspecting the Ears
 Before you begin the process of cleaning your cat’s ears, it’s important to inspect them for any signs of redness, discharge, or foul odor. This step is crucial as it allows you to identify any potential issues or infections that may require further attention.
To inspect your cat’s ears, gently lift the ear flap and take a close look inside. Look for any redness or inflammation, which could indicate an infection or irritation. Check for any discharge, such as wax or pus, as this can also be a sign of an underlying problem. Additionally, pay attention to any foul odor emanating from the ears, which could be a sign of infection or ear mites.
If you notice any of these symptoms during the inspection, it is advisable to consult a veterinarian for further evaluation and guidance. They will be able to provide appropriate treatment if necessary and ensure your cat’s ears are in good health.
How to Hold Your Cat
 Learn the proper technique to hold your cat securely while cleaning their ears to avoid any discomfort or injuries.
Holding your cat properly during the ear cleaning process is crucial to ensure their safety and prevent any potential injuries. Here are some steps to follow:
- Find a quiet and comfortable area where you and your cat can both relax.
- Gently approach your cat and allow them to sniff and investigate the ear cleaning supplies.
- Slowly and carefully pick up your cat, supporting their body with one hand under their chest and the other hand supporting their hindquarters.
- Make sure to keep a firm but gentle grip on your cat, ensuring they feel secure and at ease.
- Position your cat in a way that allows you easy access to their ears. You can either hold them in your lap or place them on a stable surface, such as a table or countertop.
Remember to always be gentle and patient with your cat. If they show signs of discomfort or resistance, take a break and try again later. Building trust and creating a positive experience for your cat during the ear cleaning process is essential for their overall well-being.
Applying the Ear Cleaning Solution
 Applying the ear cleaning solution to your cat’s ears is an essential step in the cleaning process. It is important to do it correctly to ensure your cat’s safety and comfort. Here are some key steps to follow:
- Start by gently restraining your cat, making sure they are calm and relaxed. This will help prevent any sudden movements that could cause harm.
- Hold the ear cleaning solution in one hand and use your other hand to hold your cat’s ear. Gently lift the ear flap and expose the ear canal.
- Using the applicator provided with the ear cleaning solution, carefully insert a few drops into the ear canal. Be cautious not to insert it too deeply to avoid causing any discomfort or injury.
- Gently massage the base of your cat’s ear for about 30 seconds. This will help distribute the solution and loosen any debris or wax buildup.
- Allow your cat to shake their head if they need to. This will help remove any excess solution from their ears.
- Finally, use a cotton ball or a soft cloth to gently wipe away any visible dirt or debris from the outer part of the ear.
Remember, always use a cat-friendly ear cleaning solution specifically designed for cats. Avoid using any harsh chemicals or homemade remedies that could potentially harm your cat’s ears. If you have any concerns or difficulties, it is always best to consult your veterinarian for guidance and assistance.
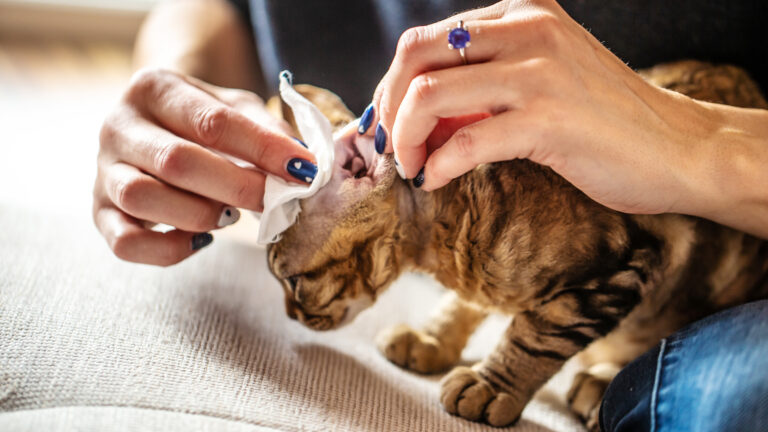
Wiping and Cleaning the Ears
 Wiping and cleaning your cat’s ears is an essential part of their grooming routine. It helps to remove dirt, debris, and excess wax, preventing infections and maintaining their overall ear health. Here is a step-by-step guide on how to gently clean your cat’s ears using cotton balls or a soft cloth.
- Gather the necessary supplies: Before you begin, make sure you have cotton balls or a soft cloth, and a cat-friendly ear cleaning solution. These supplies will help you effectively clean your cat’s ears without causing any harm or discomfort.
- Securely hold your cat: Find a comfortable and secure spot for your cat. Gently hold your cat’s head, ensuring that they feel safe and supported throughout the cleaning process.
- Apply the ear cleaning solution: Squeeze a few drops of the ear cleaning solution onto a cotton ball or a soft cloth. Gently fold back your cat’s ear flap and wipe the visible part of the ear, avoiding the ear canal.
- Wipe away dirt and debris: Use a fresh cotton ball or a soft cloth to wipe away any dirt or debris from the ear. Be gentle and avoid inserting anything into the ear canal, as it can cause damage.
- Repeat on the other ear: Repeat the same process on your cat’s other ear, ensuring that you use a fresh cotton ball or cloth for each ear.
Remember to reward your cat with treats and praise after each successful ear cleaning session. This positive reinforcement will help create a more positive and stress-free experience for your furry friend. If you notice any concerning symptoms or your cat appears uncomfortable during the cleaning process, it’s best to consult a veterinarian for further assistance.
Tips for a Positive Experience
 When it comes to cleaning your cat’s ears, creating a positive experience is essential. By following these tips, you can ensure that the process is comfortable and stress-free for your furry friend.
- Choose a quiet and calm environment for the ear cleaning session. Minimize distractions and loud noises that could startle or stress your cat.
- Start by gently massaging your cat’s ears to help them relax. This will also allow you to assess their comfort level and any potential sensitivity.
- Use treats as a form of positive reinforcement throughout the cleaning process. Reward your cat with a treat after each successful step to associate the experience with something positive.
- Take breaks if needed. If your cat becomes anxious or restless, give them some time to calm down before continuing. Patience is key.
- Make sure to use a cat-friendly ear cleaning solution that is recommended by your veterinarian. Avoid using any harsh or irritating substances that could cause discomfort or harm.
- If your cat consistently struggles or becomes extremely stressed during ear cleaning, consider seeking professional help. A veterinarian can provide guidance and assistance to ensure proper ear hygiene.
Remember, the goal is to create a positive association with ear cleaning for your cat. By following these tips and being patient and gentle, you can make the process more comfortable and stress-free for both you and your feline companion.
Using Positive Reinforcement
When it comes to cleaning your cat’s ears, positive reinforcement can go a long way in making the experience more enjoyable for both you and your furry friend. By using treats and praise, you can reward your cat for their cooperation during and after the ear cleaning session.
Firstly, it’s important to choose treats that your cat loves and finds irresistible. These treats can be used as a motivator to encourage your cat to stay calm and still while you clean their ears. Before you begin the cleaning process, offer your cat a treat to create a positive association with the activity.
During the cleaning session, remember to provide verbal praise and gentle petting to reassure your cat and let them know that they are doing a great job. This positive reinforcement can help reduce any stress or anxiety your cat may feel during the process.
After the ear cleaning is complete, don’t forget to reward your cat with another treat and shower them with praise. This will further reinforce their good behavior and make future ear cleaning sessions easier.
By using positive reinforcement, you can turn ear cleaning into a positive and rewarding experience for your cat, ensuring their ears stay clean and healthy.
Seeking Professional Help
While cleaning your cat’s ears at home is generally safe and effective, there may be situations where it’s necessary to consult a veterinarian for assistance. It’s important to be aware of when professional help is needed to ensure the health and well-being of your furry friend.
If you notice any concerning symptoms during the ear cleaning process, such as excessive redness, swelling, or discharge, it’s best to seek veterinary attention. These could be signs of an underlying ear infection or other medical condition that requires proper diagnosis and treatment.
Additionally, if your cat becomes extremely stressed or anxious during the cleaning process, it may be beneficial to consult a veterinarian. They can provide guidance on how to make the experience more comfortable for your cat or even perform the ear cleaning themselves if necessary.
Remember, your veterinarian is the best resource when it comes to your cat’s health. If you have any doubts or concerns about cleaning your cat’s ears, don’t hesitate to reach out for professional assistance.